Showing posts with label frugal living. Show all posts

Tuesday, December 15, 2015

Make Your Own Ugly Christmas Sweater

Ugly Christmas sweater parties are so much fun this time of year, but have you seen the prices on those ugly sweaters?  I don't know about you, but I don't want to pay a high price for an ugly Christmas sweater that will probably only be worn once during what happens to be the most expensive month of the year.

When my daughter's youth group decided to wear ugly Christmas sweaters to the youth Christmas party I knew what I had to do!  Make one!  I'm really not sure who was more excited.  Bethany was super excited about the party and getting to wear an ugly sweater and I was super excited for the chance to make one.  I have had this idea for a while now, but never had a reason to make it!

Bethany actually found out that she was going to be able to go the party a day before the actual event.  She was originally supposed to work that evening, but plans changed.  We made a quick trip to Goodwill and Dollar General for supplies.
At Goodwill we found a men's green shirt.  We wanted something pretty large because I knew we would need something big for the hoop at the bottom.  For the hoop I used an old canopy I had.  You know the kind, the one's for a little girls bedroom covered with tulle.  Anyway, I sewed the hoop in using the sewing machine and we hot glued the rest of the items in place.  We had some gold garland and some ugly ornaments all purchased at Dollar General.  With the shirt costing $3.00 and the Garland and ornaments totaling $5.00 I was able to complete the whole project for under $10.00.

It turned out super ugly and she won first prize!

On our way there she had to ride in the back seat because the hoop was so big and and she was not able to put the shoulder seat belt on.  Don't worry, I was still parked when I took the pic!
We had to make a quick run into Walmart.  This picture may end up on the people of Walmart site.  I mean really..who goes shopping dressed like a tree?  But hey, if people can wear pajamas to Walmart...

We had five different people approach us and compliment her ugliness.  In fact several one person started by saying "you won"!  They were right!


Tuesday, September 11, 2012

Meet Me in St. Louis

Today we decided to take in some of the sites of the great city of St. Louis.  Now that I'm home and thinking about how our day went I can't help but think of the quote from the movie Meet Me in St. Louis when Tootie says "Wasn't I lucky to be in born in my favorite city?"  :):)

It amazes me how many things there are to do in and around the St. Louis area for FREE!!  I plan on taking full advantage of some of these places.  We are studying Missouri History in school and we plan on taking LOTS and LOTS of field trips this year!  

Today we went to the zoo, had a picnic in Forest Park and then headed to The St. Louis Walk of Fame on the Loop.  It was a great day.  Besides gas money I spent $3.01 today and that was only because I was tempted by Starbucks. ;)  You can't beat that for an afternoon and evening full of fun and memories!!


Thursday, June 14, 2012

In Door Out Door

Check out this awesome outdoor cozy corner made of old doors!  I love it.  I'm envisioning myself sitting there in that blue chair with an ice cold glass of tea!

Thursday, June 7, 2012

Grapesicles!

Looking for a healthy summer treat that is sure to cool you off on a hot summer day and tantalize your taste buds at the same time.  If so I have a grape  great idea for you!  Grapes on a skewer!  Pop them in the freezer and you have a delicious healthy alternative to popsicles that the kids are sure to love!  Mom will love them too because they are quick, easy and healthy!!

Thursday, May 31, 2012

Homemade Fabric Softener

I decided to try a recipe for homemade fabric softener that I seen on pinterest.  It's a super easy recipe and I really like it!

All you need is:

6 cups of hot water
3 cups of white vinegar
2 cups of hair conditioner

Mix all the ingredients in a bowl.  Use a wisk to mix it together real good.  Add to a container for storing and use the same amount as you normally use in your rinse cycle.  You can also spritz it on a washcloth and throw it in the dryer instead of a dryer sheet.  The smell of the hair conditioner over powers the vinegar and you do not have the strong vinegar smell.  I will definitely be using this from now on!

This is what I keep mine in.  One batch filled all three bottles to the top and I still had some left!

Tuesday, May 29, 2012

Highly Concentrated Homemade Laundry Detergent

I'm so excited to share with you a new kind of homemade laundry detergent.  I've been making my laundry detergent for years now and a little over a year ago I shared my recipe with my readers (check it out here).  I recently ran across a recipe for a highly concentrated version of this detergent and I absolutely LOVE it!

It has the same ingredients as the original version except you double the quantities.

2 bars of Fels Naptha
1 cup Borax
1 cup Washing Soda
6 cups of water (+ a little more as needed)

The first thing you want to do is grate your soap.  I always do this ahead of time and keep it in ziploc bags or a jar.  That way when I need to whip up some soap I have everything ready.  Put 6 cups of water in a large saucepan and and add the grated soap.  Heat on medium low heat until all the soap is melted.  This is the part that takes the longest because you don't want your water to boil, but you want to be sure that all the soap melts.  When your soap is melted you can add the borax and the washing soda.  Stir until it disolves.  Add your mixture to 4 - quart jars.  Let it sit over night.  In the morning your will have a hard layer of soap on top and a watery gel on bottom of each jar.

Now the fun part!!  Take a knife and cut through the hard layer.  Pour the mixture of one jar into a large bowl.  Add 1-3 tablespoons of hot water to the jar you just emptied and swish it around to get out any remaining soap and add that to the bowl as well.  Now your going to mix that up.  I actually used my Ninja Master Prep which is a high powered blender.  This worked well for me so you may want to use something similar rather than the bowl and mixer method.  As you are blending it, you will see that the consistency of it becomes fluffy and kind of looks like pudding.  When your reach that consistency you can add it back to the quart jar and do the same process with the rest.  With the extra water you add, you will end up with more than 4 quarts.  Mine made 4 quarts and 1 pint plus a little extra.  To use it, add 1 tablespoon to your laundry.  That's it.  Just think...1 quart jar will give 64 loads of laundry!  So 4 quarts + 1 pint = a very economical detergent!


Saturday, March 3, 2012

Homemade Toothpaste

There are so many things I want to do on my journey to a more natural lifestyle.  Little by little I am making changes.   After searching high and low and trying several recipes for homemade toothpaste I finally stumbled upon one I really like.  Actually, I love it!  I love how clean it makes my teeth feel and it is even supposed to whiten them over time.  

It is so simple to make.  All you need is some Coconut Oil, Baking Soda and some essential oil.  The essential oil is optional.  I used orange because it is what I had on hand.  Peppermint would be great for this recipe if you like the minty freshness.  I also use non-aluminum baking soda.  If you didn't know that baking soda and baking powder has aluminum in it you should check into the dangers of this.  You can get both of these staples aluminum free from Bob's Red Mill online or from your local health store.  I was able to purchase mine through our produce co-op (the Bob's Red Mill brand) at a very reasonable price.

Mix together
4 Tablespoons of Coconut Oil
5 Tablespoons of Baking Soda
8-10 drops of essential oil (optional)
Put it in a container of your choice and your all ready to start brushing. :)

Thursday, October 20, 2011

The Prudent Homemaker

This week I stumbled on a website called The Prudent Homemaker.  You can check it out here.   I have been spending most of my free time lately checking it out.  It is full of amazing recipes, money saving ideas and much more.  There are so many recipes that I can't wait to try.  Top of my list is her French Bread recipe and also her recipe for graham crackers.  I also love the idea she has of keeping a price book so you know which store offers the lowest prices.

I've really been trying to find ways to save money on our grocery bill lately.  I've started couponing.  I'm not extreme or anything, just trying to save a little money.  This site has been a great motivator for me so if you are looking for ways to save money or just need some new recipes you should check it out! :)  I'm sure you'll love it as much as I do!

Tuesday, October 18, 2011

Cappuccino Mix Recipe

I have been on a cappuccino kick for a while now so I decided to see if I could find a recipe where I could make my own mix and hopefully save a little money.  I found this recipe on allrecipes.com and I absolutely love it.  I did do a little tweaking to it to suit my personal taste. I put in a little less coffee, I added 1/2 cup powdered sugar and a little more creamer. 

2/3 cup instant coffee granules

1 cup powdered non-dairy creamer
1 cup powdered chocolate drink mix
1/2 cup white sugar
3/4 teaspoon ground cinnamon
3/8 teaspoon ground nutmeg

Directions

1. Put the instant coffee into a food processor, and process to a fine powder. If you don't have a food processor, put it into a large plastic bag, and crush with a rolling pin.

2.In a large bowl, combine creamer, chocolate mix, instant coffee, sugar, cinnamon, and nutmeg. Stir together until well mixed. Spoon into storage container

Mix 3 tablespoons of powder with 6 fluid ounces hot water.
 
I also use about half the mix it calls for when making a cup full.  To complete it I add a Tablespoon of Coffee Mate Pumpkin Spice liquid creamer!  DEEE-Lish!!!

Thursday, March 31, 2011

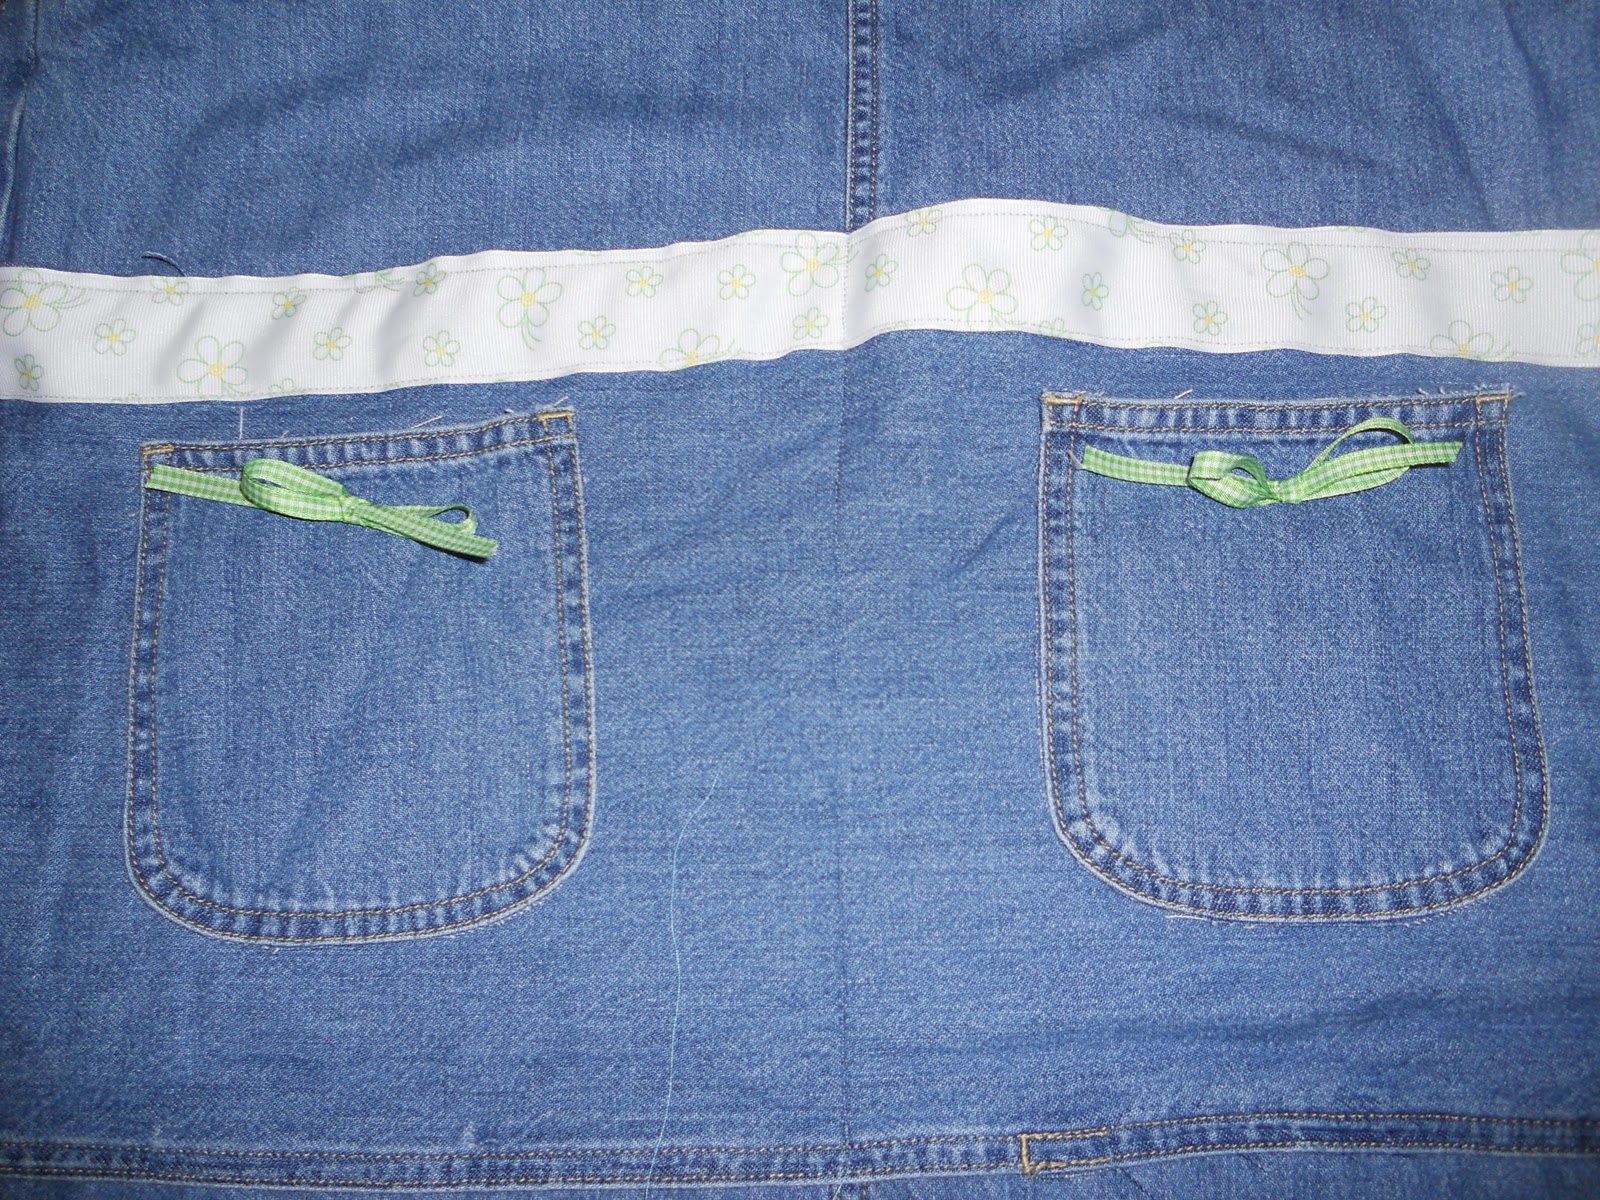
A Garden Apron

I was feeling creative today and decided to make an apron especially for gardening.

What attire says "garden" better than overalls! 

A while back I purchased a denim overall jumper at a second hand store for $1.50 and today I repurposed it into my garden apron. 

Since I am a girly girl I had to add a few ribbons and bows! 
 And of course I saved some matching ribbon to wear in my hair!

I love the way it turned out.  It has tons of pockets for holding  garden gloves, seeds, small gardening tools, and anything else I have a mind to put in there. 

It took me less than an hour to make and cost me less than $2.00.  That's my kinda project! 

Now if we can just get some warmer weather so I can use it!

Thursday, March 10, 2011

Homemade Laundry Detergent

I love, love, love making homemade laundry detergent!  I've been making it for about 2 years now.  It saves so much money and I love using products that I know exactly what is in them.   Here is a list of the ingredients you will need.

4 cups - hot tap water
1 Bar - Fels Naptha soap (you can use Ivory)
1 Cup - Arm & Hammer Super Washing Soda (NOT baking soda)
1/2 Cup - Borax
1/2 Cup - Oxi Clean *optional*
The first thing I do is grate my soap.  When I first started making homemade laundry detergent I used Ivory soap.  Now I use Fels-Naptha and let me tell you, it really does make a difference.  If at all possible try to find some Fels-Naptha it is a laundry soap so it is made to do what we are using it for and it smells so good!
Bethany loves to help with the grating!
I try to grate my soap and put it in a jar so it is all ready when I need it.  Instead of having to take the time to grate it, I can just start the process!

Put your grated soap and 4 cups of water in a saucepan and stir over medium-low heat until all the soap dissolves and is melted.  Be sure that it all melts!!

Next, fill a 5 gallon bucket half full with hot tap water. Add melted soap, washing soda and Borax.
Stir well until all powder is dissolved.
Fill bucket to top with more hot water.
If you like you can add 10-15 drops of essential oil per 2 gallons after soap is cooled.  I've only added the oil myself, one time.  Essential oil is not cheap and I did not see a huge difference.  The Fels-Naptha gives it a nice smell anyway!  Now, cover it and let it sit over night.

The next morning it will be a very thick gel!  Fill a used, clean, laundry soap dispenser half full with your homemade laundry soap and then fill rest of way with water. Shake before each use.

Use 1/2 cup per load - It is a low sudsing soap. If you do not see soap suds, it's okay. It's not the suds that do the cleaning, it's the ingredients in the soap.

If you break down the expense - to make 2 gallons averages to be less than 1 cent a load. Who can beat that?!?

Be sure to use washing soda not baking soda. You can find it and the Fels-Naptha in the laundry aisle. Schnucks and  Shop n Save are two places that carry it around my neck of the woods.

Wednesday, March 2, 2011

Upcycled Denim Skirts from Recycled Jeans - It's what I do!

Several years ago I was at a church youth camp and noticed that some young teenage girls had on denim skirts that were made out of blue jeans.  They were so cute!   I knew I had to learn how to make them.   I went home and got right to it.   They are super easy to make and the skill of making them has been such a blessing in my life.   In more ways than you can imagine! 

As a mother I find it very difficult to find modest clothing for my daughter.   So being able to make her cute, fun and unique denim skirts has been a lifesaver!  

I also have used it as a way to earn a little extra spending money.  Mainly for Christmas, Birthday's, and anything extra that we need.   For instance...I will be going to a homeschool expo at the end of this month and selling these skirts are a way for me to be able to buy a few of the school books we need for next year.

It is also, in a sense, a ministry for me.  I offer my skirts at a very reasonable price.  Usually people are shocked when I tell them the price.    Knowing how hard it is to find decent clothing for young ladies, makes it all the more important to me to offer it to others.   It has been a blessing to me and I want to share that blessing with others.  

I Peter 4:10 As every man hath received the gift, even so minister the same one to another, as good stewards of the manifold grace of God.

I've had several people ask me to share how I make the skirts.   I will eventually do that.   I'm thinking a blog tutorial with pictures will be the best.   I just have never taken the time to do that yet.  It's on my to-do list. :)  For now though I'll share a few picture of some of my  creations!!
 These jeans were laced on the side so I removed the original lacing and added a matching red ribbon on each side.  Also shown is the back view.   I love the little girl sizes that are small enough to use a bandanna.  They turn out so super cute!!

Another fun skirt made with a pink polka dot insert and a matching belt that could also be used as a headband!!
 Are you loving these yet???
 One more!!!
If you are convinced that your daughter would look so adorable in one of these skirts, shoot me a message and we'll talk!


Monday, February 21, 2011

Starting Seeds Indoors

Spring Fever - a feeling of restlessness and excitement brought on by the coming of spring.

Each year about this time I get a case of spring fever.  The cure...starting seeds indoors.  It's really easy and fun.  It can save you money in the long run and it is enjoyable for any garden lover. 

There are several ways you can go about it.  This year I invested in a couple Jiffy Greenhouses...


Some Jiffy-Strips and some Jiffy Organic Seed Starting Mix.


And of course my seeds.


My seeds of choice this year are...tomatoes, zucchini, squash, cucumber, cantaloupe, peppers, watermelon, broccoli, parsley, chives, basil, dill, lettuce and marigolds.

I love the little greenhouses because it is all ready for you.  It has everything you need but the seeds!

The first thing you have to do is add water.  This expands the peat pellets.

This is how they look after they expand.
Then you need to gently pull back the netting that is on top of the pellets.  It's also good to kind of fluff and level the peat.
This is how they should all look now.
Next, plant your seeds.  We did 2-3 seeds per pellet and we covered them lightly with the peat.
If you are planting several different kinds of seeds be sure to label so when they come up you no what is what.  
Next put the lid/dome on the tray and place it in a warm spot.  
 When the first seeds begin to sprout you can prop the dome open.  When they all have sprouted you can remove the dome and place the tray in a sunny location.  Be sure to water your seeds when the peat turns a light brown. 

Pretty simple!  Be sure to save your greenhouse for next year.  You can buy refill pellets or you could just fill the tray with starter mix. 

If you'd rather not invest in a little greenhouse there are several alternatives.  Egg cartons work great!  Some people use old tea cups, be creative with it and enjoy yourself! 

                                                                                                                   “It's spring fever.... You don't quite know what it is  you do want, but it just fairly makes your heart ache, you want it so!”  Mark Twain.