Showing posts with label natural living. Show all posts

Thursday, June 9, 2016

Gardening, God and Grace

There are few things that I enjoy more than gardening. There is something very rewarding about working the land, planting, caring and growing your own food. I've always thought I'd like to live off-grid, homestead my own land and be self sufficient. Since that lifestyle is out of reach for me I do what I can in the place that God has put me.

This year my garden is a tiny bit smaller than previous years. We have woods on three sides of us and a field on the other side. The field is owned by our new neighbors and they have chose to let it grow up. This has happened one other year in the nine years I have lived here and that year my garden was a waste of time and effort. Between the deer, raccoon, groundhogs and squirrels I did not get and harvest that year. Naturally I am afraid of the same happening again. I have several plans to try to avert this, but I'll talk about that more in another post.

This past Tuesday was beautiful. The temperature was in the seventies, the sun was shining and there was a cool breeze blowing. I took advantage of the day by doing some garden work. I got it all tilled and hoed, my tomatoes staked, added some Epsom salt around some plants and worked on some ways to repel wildlife.
It felt so good to be in the sunshine. At the end of the day my body was tired, but my heart was happy and my soul at ease. I always get in some extra prayer time while in the garden and spending the day talking with God is what I needed most. This past year has been challenging. I have faced some things that have been very hard. Everyone has a battle they're fighting and I'm no exception. But one thing I know... God's grace gets me through. I often wonder how people who don't have God make it. He is my rock, my firm foundation. When the world around me shakes, He is my steady. Sometimes I just need a little garden time with God to be reminded of His goodness.


Thursday, July 12, 2012

Comfrey and Calendula Poultice

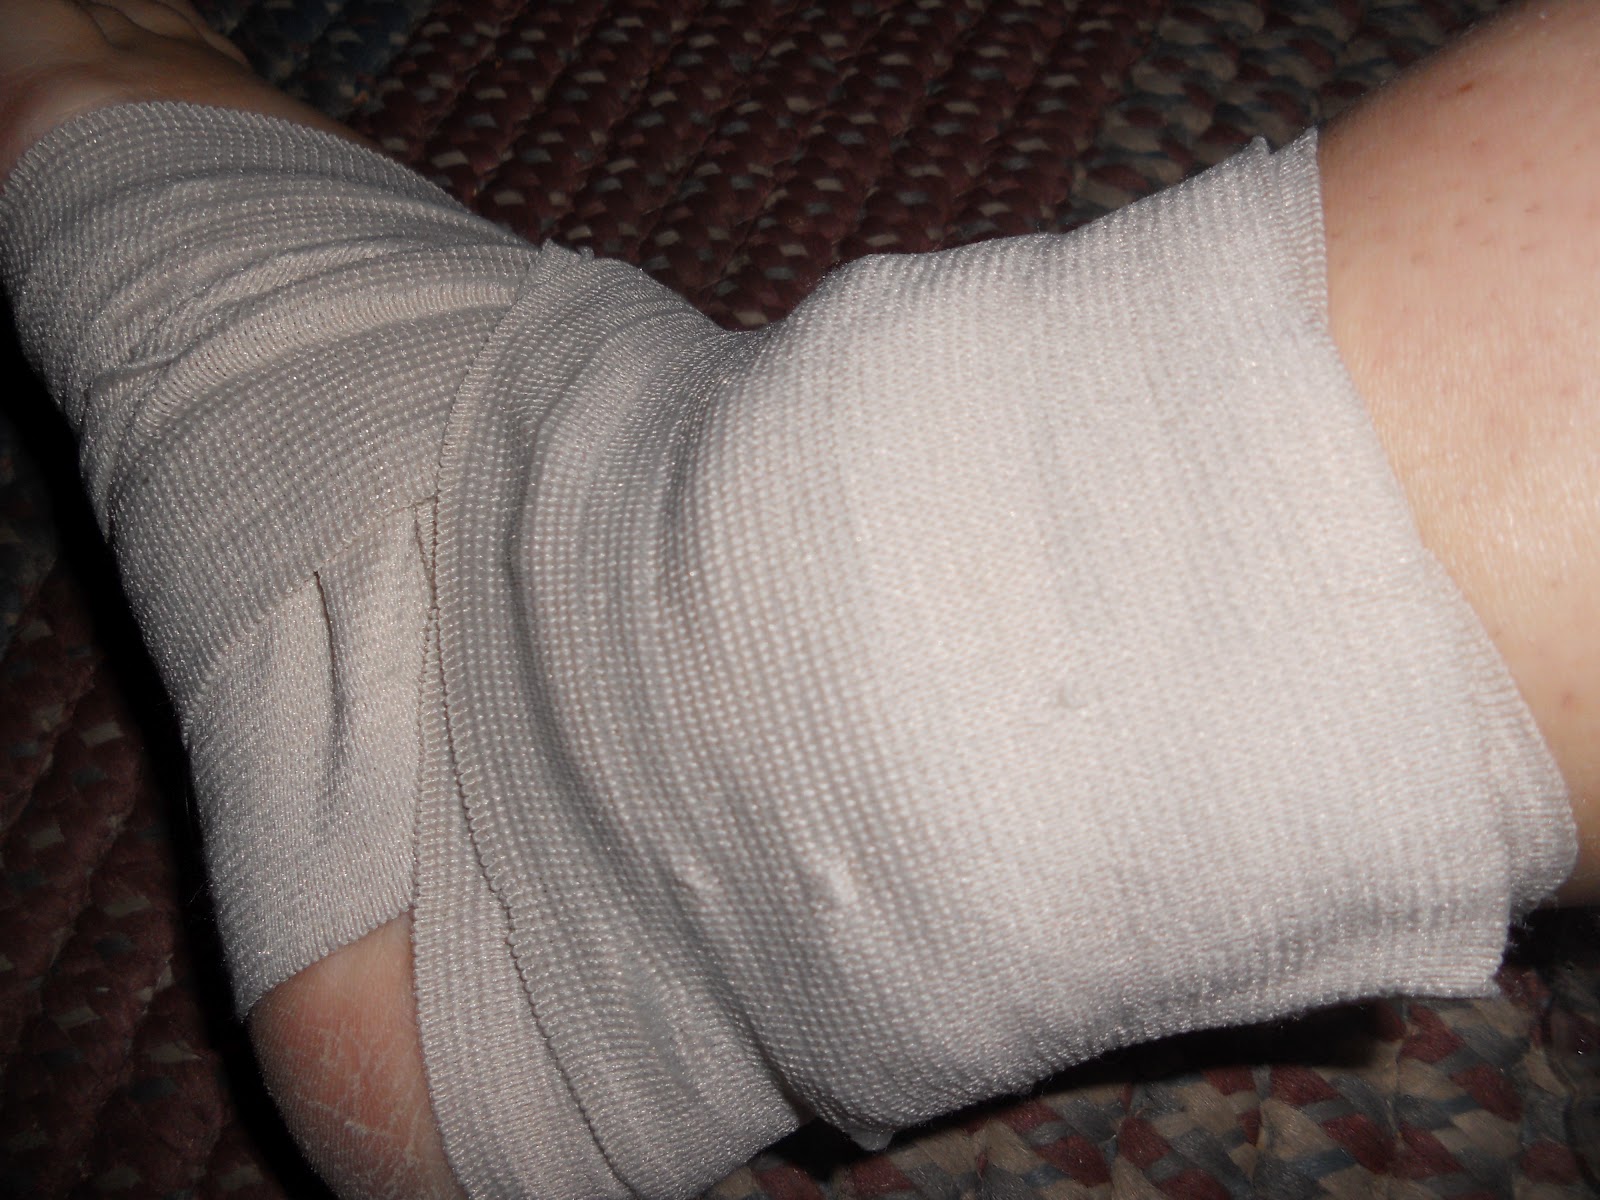
A few weeks ago I hurt my ankle.  I'm not really sure what I done to it, but I do know it hurt and it swelled up.  I had to wear a brace and one evening the swelling seemed worse than ever so I decided it was time to try a herbal remedy.   

Last year I started growing Comfrey in my herb garden.  This is an herb that has always captured my interest as it has so many great healing properties.  It is for external use only and is good for  muscle pains, reducing swelling, bruising and even healing broken bones.  Yes, broken bones!  Comfrey knits things together.  You can even use it on open wounds, but you have to be very careful when doing this because it can heal a cut extremely fast.   If you don't have the wound cleaned properly it can close it up with the dirt/infection inside.  So be sure to clean your wound very good if you intend on using it on any open wounds.

Calendula is another favorite of mine.  I didn't grow the annual flower this year but I had plenty of dried flower heads from last year.  Calendula is good for bruising, strains and inflammation (just to name a few).  So I decided to add it with my comfrey pultice and see what happened.

I picked some fresh comfrey leaves and got my jar of dried calendula flowers.  I tore the comfrey into smaller pieces and put both herbs in a bowl.  I then boiled some water and poured the boiling hot water over my herbs.  I let the herbs steep for about 20 minutes.  After the 20 minutes I drained off the access water and made several bandages by putting the poultice on strips of gauze.  I then put them in the freezer.  
After they were nice and frozen I removed it from the freezer and applied the gauze poultice directly to my ankle.

I also wrapped an ace bandage around my ankle to hold it in place.


And guess what!!!!  The swelling was COMPLETELY gone in the morning.  The pain was hardly noticeable.  I went ahead and continued changing the poultice the next day and my ankle was all better!  I was so excited.  I love using herbal remedies and to know without a doubt that it works give me an amazing feeling.   

There are a few things I would do different.  Next time I'll put the herbs in a blender to make more of a softer puree.  I think I'll add a little flour or cornstarch to make it a thick gel like substance.  I'll still use the gauze because it worked really well.  A matter of fact, I think I'll whip a few up and keep them in the freezer.  You never know when an injury might happen and you need a quick remedy!  Plus it will be great to have in the winter months when I can't go out and pick fresh comfrey.  

Monday, July 9, 2012

Canning Days of Summer

The extreme heat and drought has taken it's toil on my garden, but God is still good and he still provides!  I'm not getting near the green beans I usually get but the other day I did manage to can 14 quarts which was not to shabby for a days work!  My sweet Bethany wanted to help and I always count it a joy when one of my children want go help me in the kitchen.  Many hands make light work!


Getting the beans ready!


Heating/sterilizing the jars in the oven.  First time I tried it this way and I loved it.  Wash and dry your jars as usual and then put them in the oven at 225 degrees for at least 20 minutes and keep them in the hot oven until you are ready to fill them with your hot green beans.


I love my magnetic wand I purchased last year on ebay!  Perfect for getting those hot lids out of the water.  Don't you just love my gingham lids?!  I found those on clearance at Wal-mart earlier this year.  I stocked up!


I love hearing the "pop" of the jars sealing!  

Friday, June 8, 2012

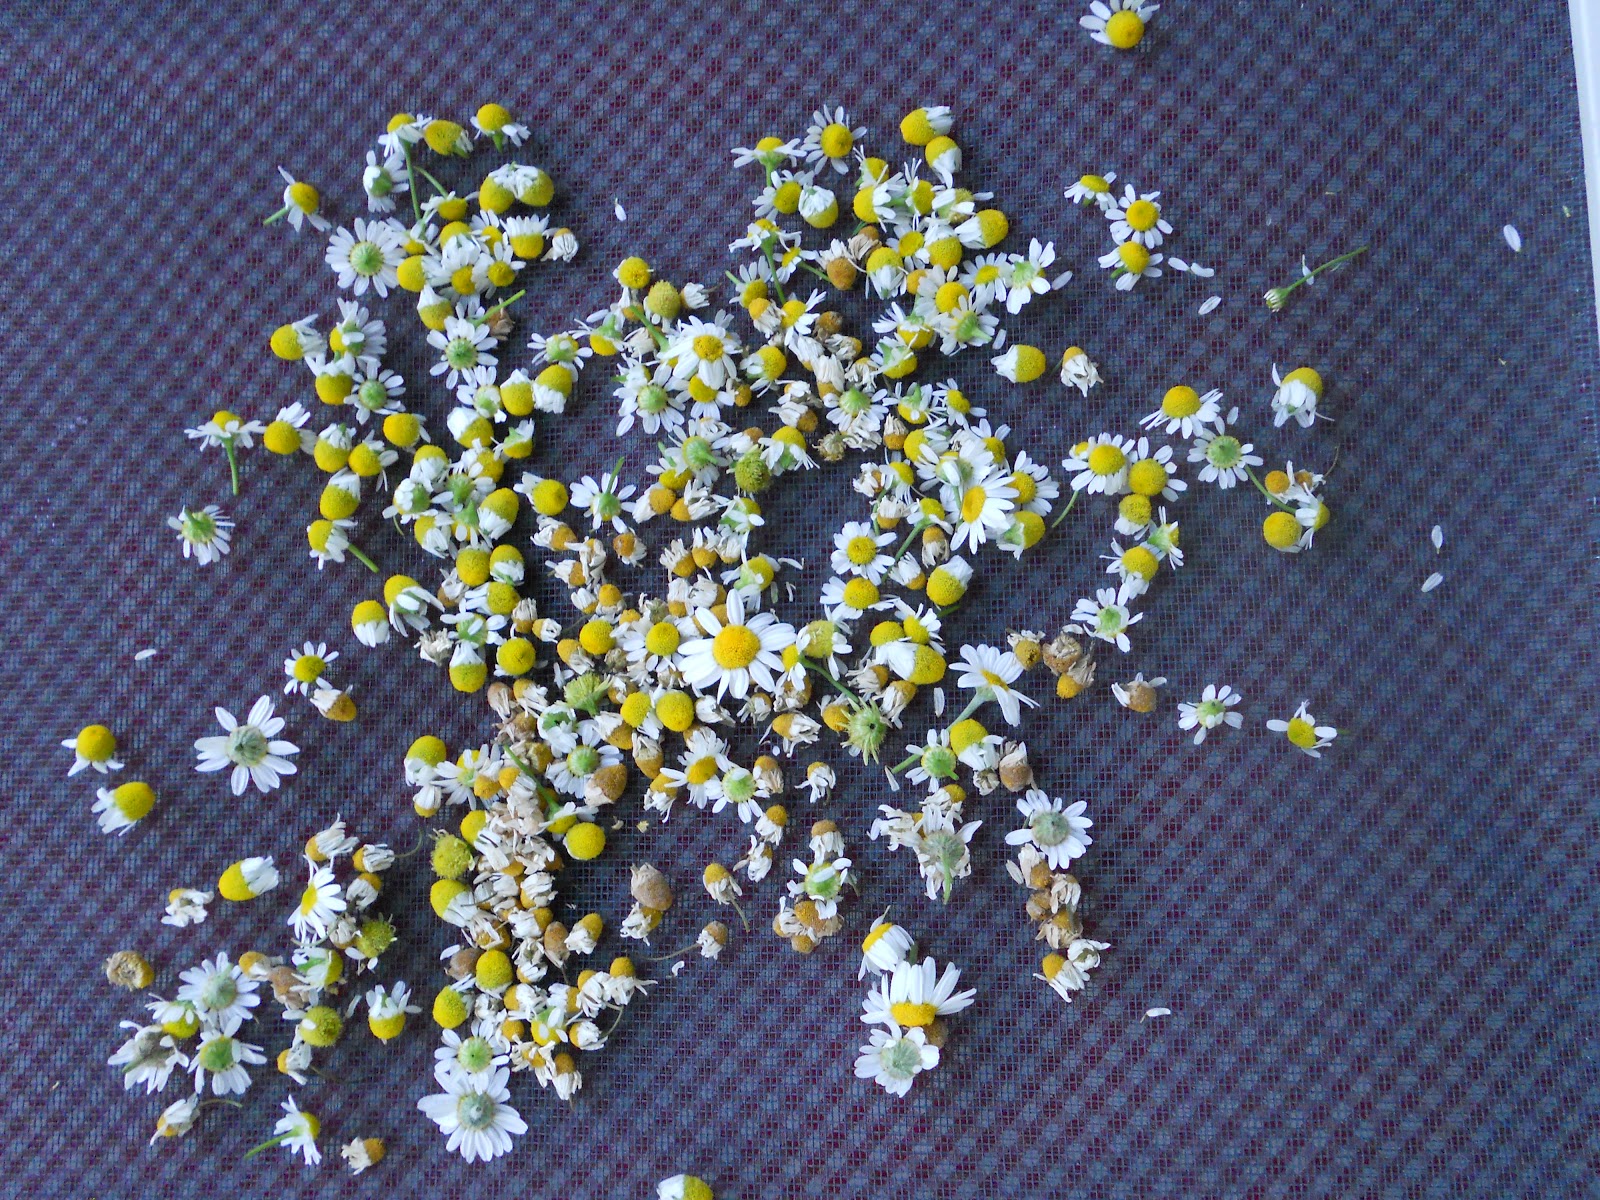
Harvesting Chamomile

I absolutely love to harvest my own herbs.  My Chamomile is blooming so nicely right now so I decided it was time to start harvesting.  I thought I would share a few tips on how to successfully harvest chamomile for the best results.

Tip #1 - It's best to harvest your chamomile in the morning sun after the dew is dried and gone.  The flower is the part of the plant that you will be harvesting and it should be fully open in the morning.

Tip #2 - Gently shake the entire plant to remove any dust/debris/bugs.

Tip #3 -  Pinch the flowers off the stem.  You just want the flower head not the stem.  This method will allow your chamomile plant to continue to produce.

Tip #4 - A drying screen (an old window screen is perfect) works great for drying the flowers.  Spread them out over the screen and place in a dark, hot, dry place.  This is important because you don't want them to mold.

Tip #5 - Store your dried chamomile in an air tight glass jar.  I love to use a mason jar for this!  Store away from direct sunlight.  Try to keep your flowers from being broke or crushed until you are ready to use them.

It's that simple!

Thursday, June 7, 2012

Grapesicles!

Looking for a healthy summer treat that is sure to cool you off on a hot summer day and tantalize your taste buds at the same time.  If so I have a grape  great idea for you!  Grapes on a skewer!  Pop them in the freezer and you have a delicious healthy alternative to popsicles that the kids are sure to love!  Mom will love them too because they are quick, easy and healthy!!

Friday, June 1, 2012

Chamomile

My chamomile is doing great this year!  I just harvested some of the flowers to dry for future use.  Don't they look so pretty in this canning jar?!  :):)

Thursday, May 31, 2012

Homemade Fabric Softener

I decided to try a recipe for homemade fabric softener that I seen on pinterest.  It's a super easy recipe and I really like it!

All you need is:

6 cups of hot water
3 cups of white vinegar
2 cups of hair conditioner

Mix all the ingredients in a bowl.  Use a wisk to mix it together real good.  Add to a container for storing and use the same amount as you normally use in your rinse cycle.  You can also spritz it on a washcloth and throw it in the dryer instead of a dryer sheet.  The smell of the hair conditioner over powers the vinegar and you do not have the strong vinegar smell.  I will definitely be using this from now on!

This is what I keep mine in.  One batch filled all three bottles to the top and I still had some left!

Tuesday, May 29, 2012

Highly Concentrated Homemade Laundry Detergent

I'm so excited to share with you a new kind of homemade laundry detergent.  I've been making my laundry detergent for years now and a little over a year ago I shared my recipe with my readers (check it out here).  I recently ran across a recipe for a highly concentrated version of this detergent and I absolutely LOVE it!

It has the same ingredients as the original version except you double the quantities.

2 bars of Fels Naptha
1 cup Borax
1 cup Washing Soda
6 cups of water (+ a little more as needed)

The first thing you want to do is grate your soap.  I always do this ahead of time and keep it in ziploc bags or a jar.  That way when I need to whip up some soap I have everything ready.  Put 6 cups of water in a large saucepan and and add the grated soap.  Heat on medium low heat until all the soap is melted.  This is the part that takes the longest because you don't want your water to boil, but you want to be sure that all the soap melts.  When your soap is melted you can add the borax and the washing soda.  Stir until it disolves.  Add your mixture to 4 - quart jars.  Let it sit over night.  In the morning your will have a hard layer of soap on top and a watery gel on bottom of each jar.

Now the fun part!!  Take a knife and cut through the hard layer.  Pour the mixture of one jar into a large bowl.  Add 1-3 tablespoons of hot water to the jar you just emptied and swish it around to get out any remaining soap and add that to the bowl as well.  Now your going to mix that up.  I actually used my Ninja Master Prep which is a high powered blender.  This worked well for me so you may want to use something similar rather than the bowl and mixer method.  As you are blending it, you will see that the consistency of it becomes fluffy and kind of looks like pudding.  When your reach that consistency you can add it back to the quart jar and do the same process with the rest.  With the extra water you add, you will end up with more than 4 quarts.  Mine made 4 quarts and 1 pint plus a little extra.  To use it, add 1 tablespoon to your laundry.  That's it.  Just think...1 quart jar will give 64 loads of laundry!  So 4 quarts + 1 pint = a very economical detergent!


Monday, May 28, 2012

Foot Spa

Yep, I was right.  Rose petals in the foot bath was delightful! :):):):)


Friday, May 25, 2012

Herbal Foot Soak

 Lately my feet have been extra achy by the end of the day, so tonight I thought I would treat myself to an herbal foot bath.  I got out my foot spa (if you don't have one a dishpan or other such thing will work just as well) and headed to the herb garden to gather my herbs.  I had my water lukewarm and I added some fresh peppermint, lovage and chamomile.  It was heavenly!  I probably soaked them for at least 45 minutes!

 Here is a list of herbs you can use and what their benefits would be:

Horsetail:  Excellent for tired feet and will help reduce perspiration.
Lavender:  creates a refreshing tonic for tired feet.
Lovage:  A strong natural deodorant, it's perfect for feet that have been stuffed in shoes all day.
Marjoram:  Soothing to tired and weary foot muscles.
Peppermint:  Energizing and cooling for hot and tired feet.
Chamomile:  Calming and relaxing plus great for skin.
Thyme:  Cleansing and refreshing for overworked feet.

Just use your imagination.  I think Rose petals would be delightful!  I think Lemon Verbena would also give a refreshing feeling!  I do believe I have a new nightly ritual! 


Saturday, March 3, 2012

Homemade Toothpaste

There are so many things I want to do on my journey to a more natural lifestyle.  Little by little I am making changes.   After searching high and low and trying several recipes for homemade toothpaste I finally stumbled upon one I really like.  Actually, I love it!  I love how clean it makes my teeth feel and it is even supposed to whiten them over time.  

It is so simple to make.  All you need is some Coconut Oil, Baking Soda and some essential oil.  The essential oil is optional.  I used orange because it is what I had on hand.  Peppermint would be great for this recipe if you like the minty freshness.  I also use non-aluminum baking soda.  If you didn't know that baking soda and baking powder has aluminum in it you should check into the dangers of this.  You can get both of these staples aluminum free from Bob's Red Mill online or from your local health store.  I was able to purchase mine through our produce co-op (the Bob's Red Mill brand) at a very reasonable price.

Mix together
4 Tablespoons of Coconut Oil
5 Tablespoons of Baking Soda
8-10 drops of essential oil (optional)
Put it in a container of your choice and your all ready to start brushing. :)

Wednesday, October 19, 2011

Final Harvest

 The cold air has moved in this week and there is a chance of the temperatures getting down to freezing one night this week so I decided I would harvest some of my herbs for the last time of the season.   I almost hated cutting down the beautiful blooming lavender.  It looked the prettiest it has all season.  I am guessing that is because we have had such a hot summer and the last month or so the weather has been perfect.  My pineapple sage was just beginning to bloom with beautiful red flowers and my calendula has blooms that were just beginning to open.  I decided to leave them alone and hopefully the cold air won't affect them because I am really wanting to harvest them and make some calendula salve. 

My mom purchase a close drying rack at a yard sale for 75 cents and it is perfect for drying herbs.  I harvested plenty today and I can't wait to add them to the already dried herbs, but right now I am enjoying how beautiful they all look hanging on the rack!  We are going to have plenty of herbs this winter for cooking, teas and much more!

Tuesday, September 13, 2011

Craft Time

I've been spending a lot of my time crafting lately.  Here is a sample of what I've been up too! :)

Bethany helped me make these waxed dipped pine cone fire starters!  I love the way they look in this basket.  I can't wait to sit them next to the wood burning stove and toss some in when I start a fire this winter.

 We also dipped some wax ornaments.  These were made from styrofoam sheet cut outs.  The cut outs we used were cookie cutters!  I love making these!  So much fun.  I still have to put finishing touches such as jute hangers on them and maybe some ric-rac embellishments on the gingerbread men!

Our house smells so good!  A mixture of Mocha and Apple pie!  Smells like fall!

I've also made a bunch of homespun coasters and some pot holders/hot pads.


Believe it or not that is not all.  I've also been making hair bows, aprons, "upcycled" denim skirts, baby gowns and homemade laundry detergent kits.  We are going to be selling all these homemade crafts at a homeschool craft fair in October.  I guess if my stuff does not sell my family and friends will get a homemade Christmas this year. ;)

Tuesday, August 30, 2011

The Best Salsa Ever

Not to toot my own horn or anything.....but, I made THEE best salsa ever this summer!  Yummy, slap your momma good.   After my yummy discovery I canned, and I canned.  After all, I must have enough to last me through till next summer.  I might have to hide a few jars just to insure that I will have some come February and March.  Or better yet, maybe someone should hide a few jars from me.  I seriously love the stuff.  Give me some tortilla chips and a bowl of my delicious salsa and I could eat it for all 3 meals.  Okay, maybe that's a little bit of an exaggeration.  I don't usually eat breakfast. 

Enough of my humble rantings.  Since good things are meant to be shared here is the recipe!

Ingredients:

8 Cups tomatoes, peeled, chopped and drained

2 ½ cups chopped onions
1 ½ cups green peppers
1 cup jalapeno peppers, chopped (use more or less for personal taste)
6 garlic cloves minced
1 tsp pepper
1/8 cup canning salt
1/3 cup vinegar
1 (15 oz) can tomato sauce
1 (12 oz) can tomato paste

Drain the tomatoes as you are chopping them and drain them several times while they are in the pan before you cook them.  This is a VERY important step.  Drain, drain, drain and then drain again. This will give you a nice chunky salsa.

Mix all ingredients together and bring to a slow boil for 10 minutes.

Fill hot jars with salsa, put hot lids and rims and and process in a hot water bath for 10 minutes.

Monday, April 18, 2011

Dandelions - Not just a Weed!

Everywhere you look in the springtime you see dandelions.  They are growing in fields, yards, along roadsides, even in the cracks of the concrete.  Most people see them as nothing more than a pesky weed.  They spray them with chemicals and poisons hoping to get rid of this persnickety weed.  I have to wonder what those people would think of me, a grown women, crawling around on my hands and knees, picking the greens, the flowers and digging up the roots.

My very first memory of dandelions was a summer long ago when 2 little girls picked what seemed to be hundreds of dandelions and dissected them into different pieces.  Each piece was a different candy in our make believe candy store.  The stems were pixie sticks, the flowers where lemon drops, the flower left on the stem was a lollipop....what fun we had that summer.

I didn't think much more about dandelions in the years to follow...until last year.  I love to research things that interest me and somewhere I heard this strange thing...dandelions are edible.  So I researched.  I googled,  I checked out library books, I asked friends who knew about simple living and herbs.  The more I found out, the more intrigued I became.  These beautiful yellow spring flowers were so much more than edible, they were also medicinal.  They are nutritious and hold so many healing properties.  And to think we refer to them as a weed.

So here is what I have found out about the dandelion:

It's official name is Taraxacum officinale which means "the official remedy for disorders"

Let's start with the leaves also referred to as dandelion greens.  The leaves are the most widely used.  They are full of so many wonderful nutrients.  They are a good source of calcium, potassium, vitamin A, and vitamin C. They have twice as much vitamin A in a one-cup serving than most vitamin pills. They also have as much calcium as a half a glass of milk. That’s more than most other vegetables.  It improves your immune system and is even said to help prevent cancer.  It's a good to use as a detox and strengthens and purifies your blood and it is also good for regulating blood sugar levels.  You can boil the leaves as you would spinach, you can eat them raw like lettuce, just toss some leaves in with your next salad, or you could make a tea.  When harvesting leaves, the best time is before the plant blooms.  Just when the bloom bud appears, and before the stalk grows.  If you wait too long they will taste bitter.  Still edible but not very tasty.  I have read that you can add a pinch a baking soda and it will help with the bitterness in teas but I have never tried this.  You also want to harvest in the heat of the day so all the dew is evaporated off the plant.

Now let's talk about the stem.  The pure latex (the milky juice) inside the stem can be applied to warts or even infected wounds.  Repeat the applications until gone and healed.  Use a fresh stem with each application.

Onto the roots.  The best time to harvest them is in the spring and fall.  Of course you want to clean them good.  I soak mine overnight in water and then scrub them with a brush (a toothbrush works great).  You can boil them and eat it like a vegetable, grated in a salad, or even steamed.  You can roast them in the oven on a cookie sheet at 250 degrees for about 2 hours, grind them, and make coffee.  It is a good diuretic, it aids digestion, removes toxins from your system making it great for your liver, kidneys and gall bladder, plus its full of vitamins and nutrients.

Last but not least...the flower.  The flower is edible too!  Fried, it is considered a delicacy.  The young unopened flowers are high in protein, are tender and can add an extra crunch to your salad.  You can even make dandelion jelly.

Here are a few things I have done with dandelions this spring:

Dandelion Vinegar


1. Pick a jar full of dandelion blossoms. Can also add greens and roots (make sure they are clean)
2. Cover with apple cider vinegar.
3. Place in a sunny location to steep.
4. Shake good every day.
5. After two weeks strain with a cheesecloth or muslim fabric
6. Store in the refrigerator.
Can be used on salads!


Dandelion Infused Oil

1. Pick a jar full of dandelion blossoms.
2. Pour olive oil (can also use almond oil or canola oil) over the blossoms until they are fully covered. 
3.  Poke around with a wooden spoon handle to make sure there are no air bubbles. 
4.  Cover with a coffee filter held on by a rubber band.
5.  Place in a sunny location (a windowsill works well) to steep for 2 weeks. (I sat the jar outside on warm afternoons) After one week, strain the mixture, throw out the brown dandelions, and add fresh ones. Cover with your coffee filter and return to sunny location for another week of steeping. I also stirred them once a day.
6.  After 2 weeks strain using a cheese cloth or muslim fabric. I strained it twice to make sure there were no unwanted particles.
 
Dandelion Salve
 
Use the above method for dandelion infused oil.  Add grated beeswax to the oil and melt it.  Add enough to reach your desired consistency.  To test the consistency drip a drop of mixture on a plate.  It will cool immediatley and you can see how thick it is. 
 
I personally like the salve better than the oil.  Oil seems more messy to me.  Due to dandelions pain relieving properties the salve and the oil can be used for achy or sore muscles.   Just apply to the area.  It can be used to relieve sinus headaches.  Rub a little on your forhead.  Great for arthritis.  Can also be used for dry patches and other skin conditions.

Next time you look out in your yard and see dandelions taking over maybe you should consider eating away your weed problem. :):)

**Be sure when you harvest dandelions that you are not harvesting plants that have been sprayed or treated with any kind of chemical**

Sunday, April 17, 2011

Plants Started from Seeds

Back in February I did a post about starting seeds indoors.  I thought I'd update ya'll on the progress.  Some of them did not do so good.  I always tend to think they need more water than what they do and over do it causing the roots to rot.  You'd think I'd learn my lesson by now, but I haven't and I'll probably have the same problem next year.  :)

Even though I lost some due to over watering I had quite a few do really good.  When it started warming up outside I began setting them outside and WOW what a difference it made.  It just goes to show no matter how hard you try, you can't replace real sunlight, fresh air and rain.  My peppers have done the best.  I also have quite a few tomatoes and marigolds.  My chives and sweet basil are coming along nicely too.  Oh and I can't forget my dill and parsley!   

Recently I planted some seeds outside in pots.  I hope they do good.  I planted Rosemary, Thyme, Calendula, Nasturtium, Lavender and I am planning on planting some Echinacea seeds right in the ground.  I have so many plans for my herbs.  Drying them, teas, salves, oils.  We'll see what happens! 

So overall I am pleased with the way my seed project has turned out.  There were a couple weeks in March that I thought they were all going to die and it was all a waste, but they pulled out of it and I will definitely do it again next year!


Monday, March 28, 2011

Beautiful Lips....Homemade Lip Balm

I made lip balm today for the first time!  It was so easy and fun and I will definetly be making more.    I love making products that I know exactly what is in them.   There is a feeling of satisfaction that comes over me when I make something myself instead of purchasing it in the store.  It makes me feel all Susie homemaker.   It's a feeling of self reliance and proficiency.  I love chapsticks and lip balms and I know it's going to sound a little bias, but this is the best my lips have ever felt. :) So much better than a store bought product.  My lips feel so soft, smooth and fresh!  Here's the recipe I used:

3 tsp. grated beeswax (or pellets)
3 tsp. cocoa butter (can also use shea)
2 tsp.  olive oil (or other oil such as almond or coconut)
2 drops of honey
4 or 5 drops of spearamint flavored oil
1 vitamin E capsul (cut open and use liquid)

The vitamin E acts as a preservative and is optional.  This made enough to fill 4 chapstick tubes.  I purchased the tubes on ebay and I also purchased a pippet from ebay to fill the tubes which was much easier then trying to funnel the mixture.

There are so many  different recipes on the internet (just ask google) and I am going to be trying some different ones soon.  I think I wil try a wild berry next time and add a smidge of color. 

If you are wanting something all natural for your lips but don't want to take the time or spend the money to make lip balm I have a very simple mixture for you:

One drop Olive oil
One dropy Almond Oil
One drop Honey

That's it!  Apply to your lips before going to bed!

Remember....don't wait for you lips to get dry and chapped.  Apply lip balm on a regular basis and your lips will stay moisturized and soft and supple.

If your lips are already really dry and flakey try this great lip cure:

1/2 teaspoon honey
1/2 teaspoon fresh lemon juice
1/2 teaspoon olive oil

Mix together all ingredients and apply to your lips and leave on overnight. In the morning you will awake to smooth, soothed lips. If you have any mixture left it should be stored in the refrigerator because of the fresh lemon juice.  It's sort of like a deep conditioning treatment for your lips!

Beautiful lips are natural lips!


Thursday, March 10, 2011

Homemade Laundry Detergent

I love, love, love making homemade laundry detergent!  I've been making it for about 2 years now.  It saves so much money and I love using products that I know exactly what is in them.   Here is a list of the ingredients you will need.

4 cups - hot tap water
1 Bar - Fels Naptha soap (you can use Ivory)
1 Cup - Arm & Hammer Super Washing Soda (NOT baking soda)
1/2 Cup - Borax
1/2 Cup - Oxi Clean *optional*
The first thing I do is grate my soap.  When I first started making homemade laundry detergent I used Ivory soap.  Now I use Fels-Naptha and let me tell you, it really does make a difference.  If at all possible try to find some Fels-Naptha it is a laundry soap so it is made to do what we are using it for and it smells so good!
Bethany loves to help with the grating!
I try to grate my soap and put it in a jar so it is all ready when I need it.  Instead of having to take the time to grate it, I can just start the process!

Put your grated soap and 4 cups of water in a saucepan and stir over medium-low heat until all the soap dissolves and is melted.  Be sure that it all melts!!

Next, fill a 5 gallon bucket half full with hot tap water. Add melted soap, washing soda and Borax.
Stir well until all powder is dissolved.
Fill bucket to top with more hot water.
If you like you can add 10-15 drops of essential oil per 2 gallons after soap is cooled.  I've only added the oil myself, one time.  Essential oil is not cheap and I did not see a huge difference.  The Fels-Naptha gives it a nice smell anyway!  Now, cover it and let it sit over night.

The next morning it will be a very thick gel!  Fill a used, clean, laundry soap dispenser half full with your homemade laundry soap and then fill rest of way with water. Shake before each use.

Use 1/2 cup per load - It is a low sudsing soap. If you do not see soap suds, it's okay. It's not the suds that do the cleaning, it's the ingredients in the soap.

If you break down the expense - to make 2 gallons averages to be less than 1 cent a load. Who can beat that?!?

Be sure to use washing soda not baking soda. You can find it and the Fels-Naptha in the laundry aisle. Schnucks and  Shop n Save are two places that carry it around my neck of the woods.